How to Connect ELD and Auto-Detect Detention
Step-by-step guide to connecting your ELD to TruckerProfit — supports Motive, Samsara, Geotab, Trimble, and Garmin. Set up auto-detection of detention events and never miss a paid waiting claim again.
Why Connect Your ELD to TruckerProfit
Manual detention recording doesn't work. You forget to check in, lose the paper note, or can't prove exactly when you arrived. ELD auto-detection solves this: the system reads your duty status changes (off-duty, sleeper berth) from your ELD provider, cross-references GPS coordinates against known facility locations, and calculates exact detention time automatically.
- 1Log into your TruckerProfit account and navigate to Settings → ELD Connection
- 2Choose your ELD provider: Motive, Samsara, Geotab, Trimble, or Garmin
- 3Click 'Connect' to begin the setup flow
Step 1: Connect Motive ELD
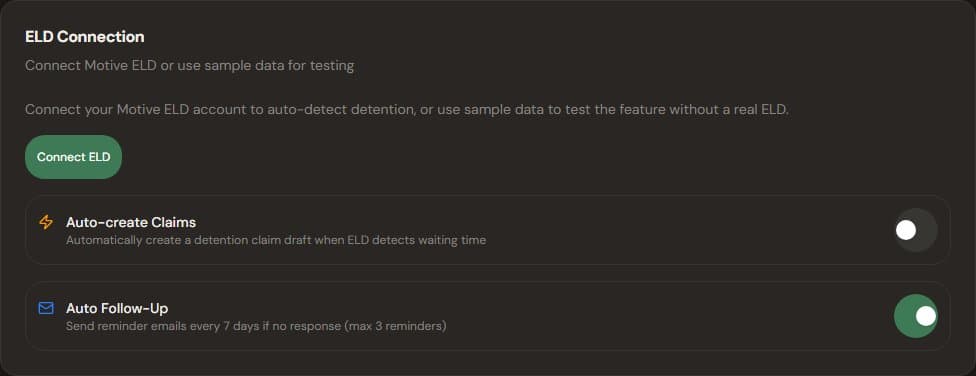
Paste your Motive API key here — starts with 'api_'
- 1In the ELD Connection dialog, select 'Motive' as your provider
- 2A new tab opens with a link to generate your Motive API key
- 3Log into your Motive dashboard at app.gomotive.com
- 4Go to Settings → API → Create API Key
- 5Copy the generated API key (starts with 'api_')
- 6Paste the key into TruckerProfit's API Key field and click Save
Warning
Keep your API key private. Never share it via email or text. TruckerProfit encrypts it using AES-256-GCM before storing.
Pro Tip
If you're unsure about creating an API key, Motive's support team can help. Most users complete this setup in under 5 minutes.
Step 2: Connect Samsara ELD
- 1Select 'Samsara' as your provider in the connection dialog
- 2Log into your Samsara dashboard at cloud.samsara.com
- 3Go to Settings → API → API Tokens → Generate New Token
- 4Name your token 'TruckerProfit' and select read-only permissions for 'Duty Status' and 'GPS'
- 5Copy the generated access token
- 6Paste the token into TruckerProfit'S API Key field and click Save
Step 3: Connect Geotab ELD
- 1Select 'Geotab' as your provider in the connection dialog
- 2Enter your MyGeotab username (usually your email address)
- 3Enter your MyGeotab password
- 4Enter your database name — this is your company's Geotab database (e.g., 'company_database')
- 5Optionally enter a Driver ID if you want to sync a specific driver's HOS. Leave empty for the main account
- 6Click Save — TruckerProfit encrypts your credentials using AES-256-GCM before storing
Pro Tip
Your database name is the subdomain in your MyGeotab URL: https://company_database.my.geotab.com.
Step 4: Connect Trimble ELD
- 1Select 'Trimble' as your provider in the connection dialog
- 2Contact Trimble support or your fleet manager to request API access for PeopleNet/Trimble HOS data
- 3Once you have your API key, paste it into the API Key field in TruckerProfit
- 4Enter your Driver ID (numeric) — this is your driver identifier from the Trimble fleet dashboard
- 5Click Save to connect
Warning
Trimble API access requires approval from your fleet administrator. Ask them to enable HOS data access for your account.
Step 5: Connect Garmin eLog
- 1Select 'Garmin eLog' as your provider in the connection dialog
- 2Register at the Garmin Developer Portal (developer.garmin.com) and create a new API key for eLog integration
- 3Copy the generated API key and paste it into the API Key field in TruckerProfit
- 4Optionally enter a Driver ID (email or identifier used in Garmin eLog). Leave empty for the main account
- 5Click Save to connect
Pro Tip
If you don't have a Garmin Developer account yet, the registration takes about 5 minutes. Use the same email you use for your Garmin eLog account.
Step 6: Configure Auto-Detection Parameters
- 1Set your default detention rate (industry standard: $50-65/hr)
- 2Set your free time (standard: 2 hours)
- 3Toggle 'Auto-Create Claims' on if you want draft claims generated automatically
- 4Toggle 'Auto-Send Claims' on to send claims automatically (requires broker info on file)
- 5Save your preferences
Pro Tip
Start with Auto-Create Claims (not Auto-Send) for the first few weeks. Review the detected events to make sure the system is identifying detention correctly before enabling full automation.
Step 7: Test the Detection
- 1Click 'Sync & Detect' on the Detention Claims page
- 2The system pulls your latest duty status data and scans for off-duty periods at facilities
- 3Review the detected events — they appear in the 'Pending' section
- 4Check the GPS coordinates match the facility where you were waiting
- 5If detection looks accurate, enable Auto-Create and verify it works for a few days
Troubleshooting Common Issues
- 1No events detected: Make sure your ELD has data for the last 24 hours. Go to your provider dashboard to verify data is being recorded
- 2Wrong facility matched: The system uses GPS radius matching. You can manually correct the facility on each event
- 3API key not saving: Check that you copied the full key including any prefix (e.g., 'api_')
Warning
If you're in a region with poor cellular coverage, ELD data may not sync immediately. TruckerProfit will catch missed events on the next sync cycle.
How TruckerProfit Helps
Detention events detected automatically from your ELD logs
- 1Once connected, every sync checks your ELD for off-duty periods at shipper/receiver locations
- 2GPS coordinates are captured as evidence — included in every detention claim PDF
- 3Detected events are matched against your broker's detention rules (rate, free hours)
- 4Claims are generated as professional PDFs ready to send in one click
- 5The system tracks pending, paid, overdue, and disputed claims for every event